How To Use Photomatix Pro 7 to Create Professional HDR
6 min read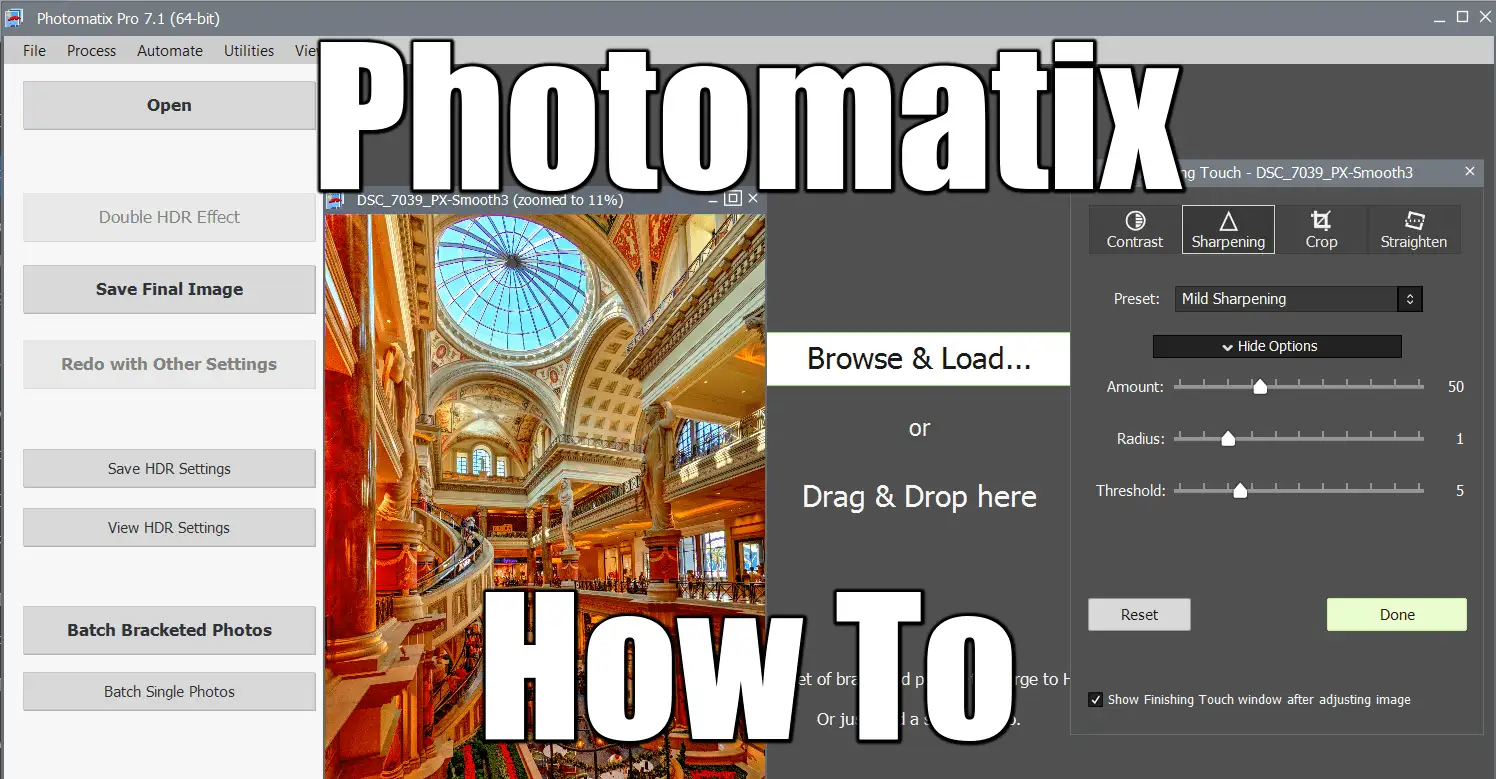
photomatix pro 7 how to featured
Why Photomatix? If you are a Real Estate photographer, Photomatix is a no-brainer. But you can do much more with it! Captain Cook, your go-to source for HDR expertise, has meticulously reviewed a comprehensive how-to-guide for Photomatix Pro 7. Photomatix Pro offers many features to streamline your job, including automation. Let’s review that!
Presentation of HDRsoft Photomatix
Used by the pros, results guaranteed. Explore Zillow or Redfin for more examples. One of those software that just gets the job done.
- PRO:
- makes stunning HDR, ready to use online to sell houses
- CON:
- Noise reduction seems sub-par
- DNG output is broken and cannot be post-processed, use TIFF instead
- Lightroom plugin: yes
- AUTOMATION: yes
- outputs DNG, TIFF, JPEG and also EXR, HDR
- regular releases, current is 7.1.1
- price: $39, Pro is $99
- my take:
- Very old software from the Windows 98 era, outdated UI but don’t get fooled: it’s totally worth its price.
- Its true power lies in the automation it comes with.
- Outstanding results, automation, it’s the preferred choice for Real Estate photography.
- GET THE JOB DONE and make money.
💡 How to use Photomatix Pro
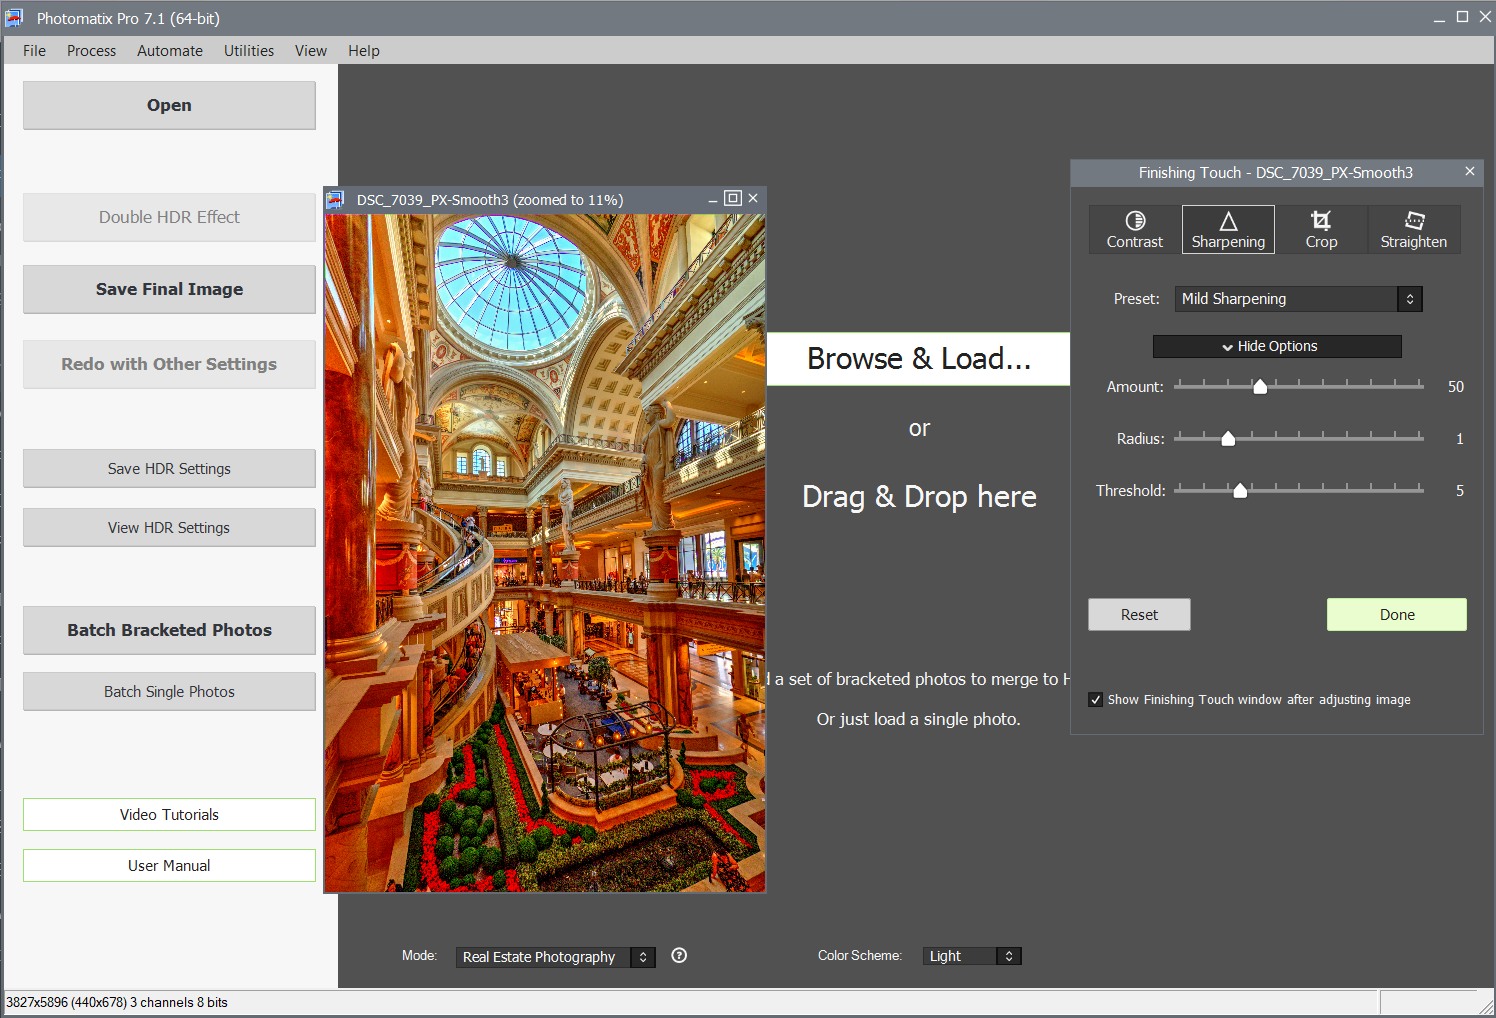
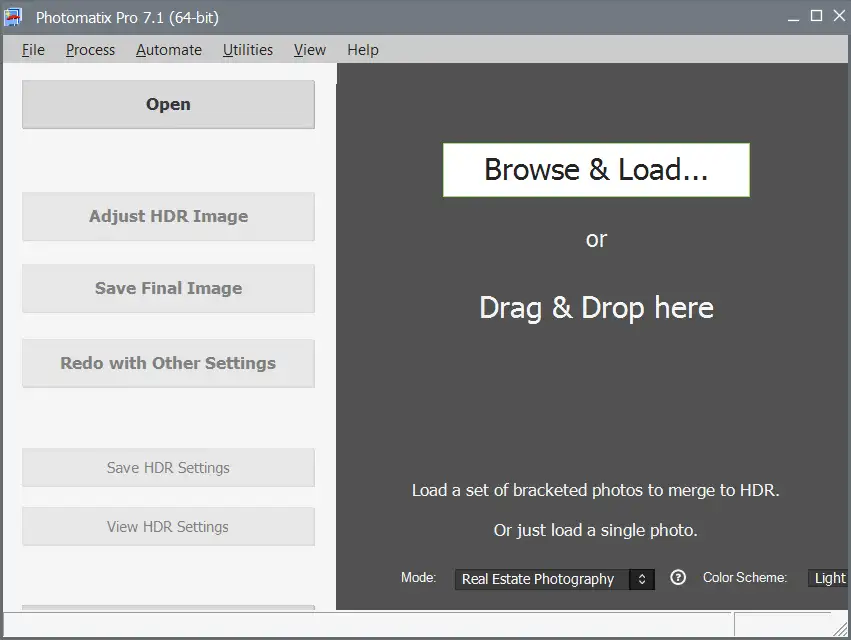
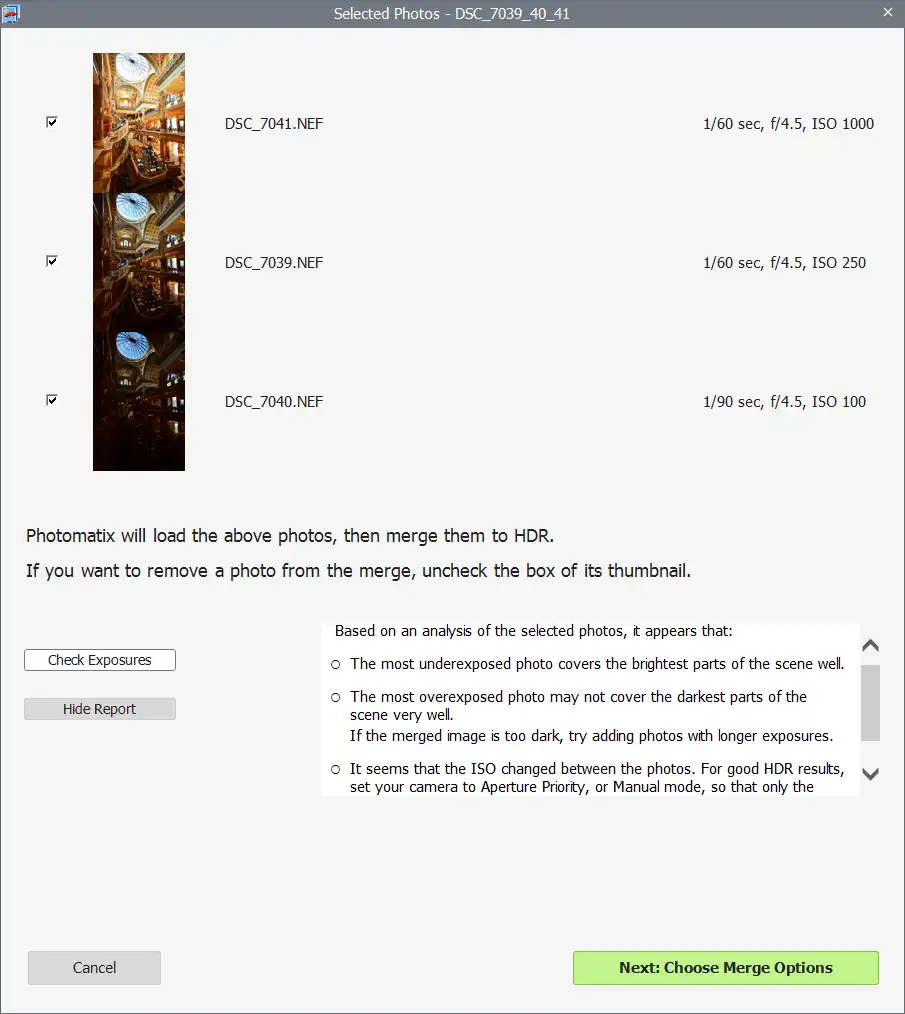
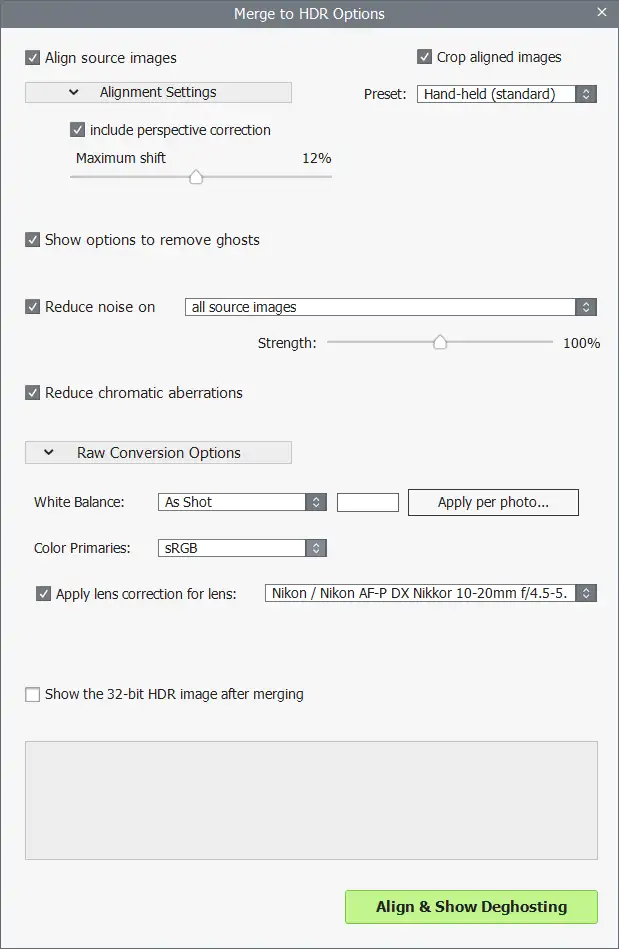
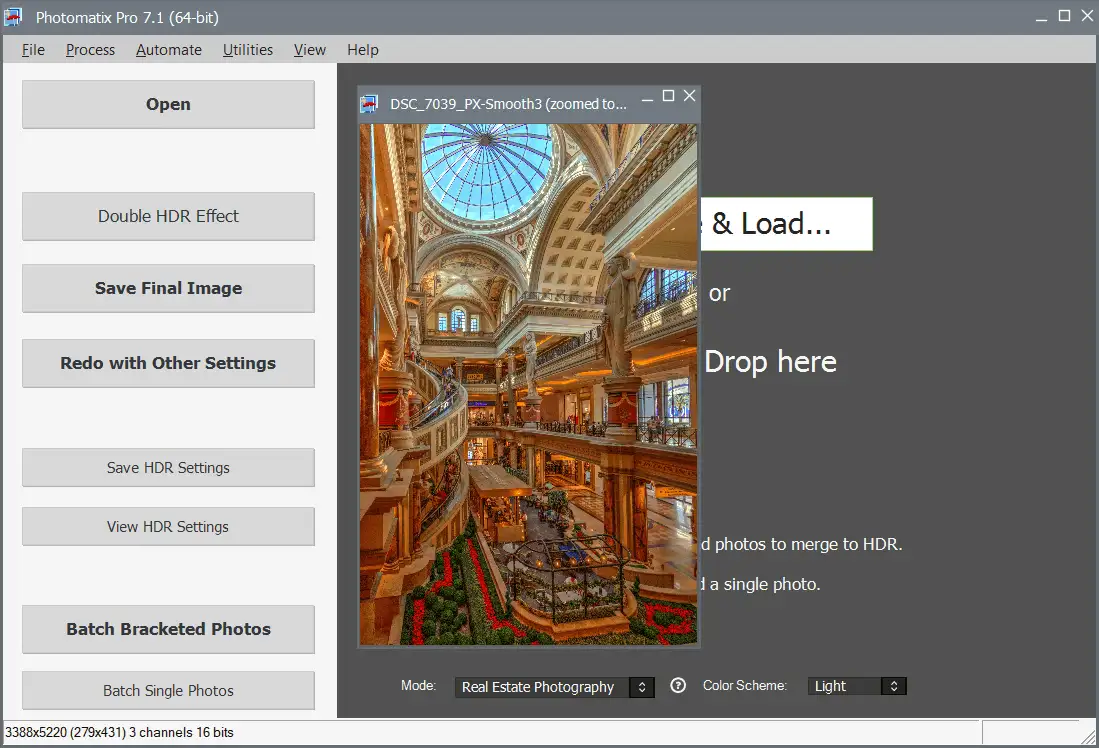
Step By Step Process To Merge Brackets
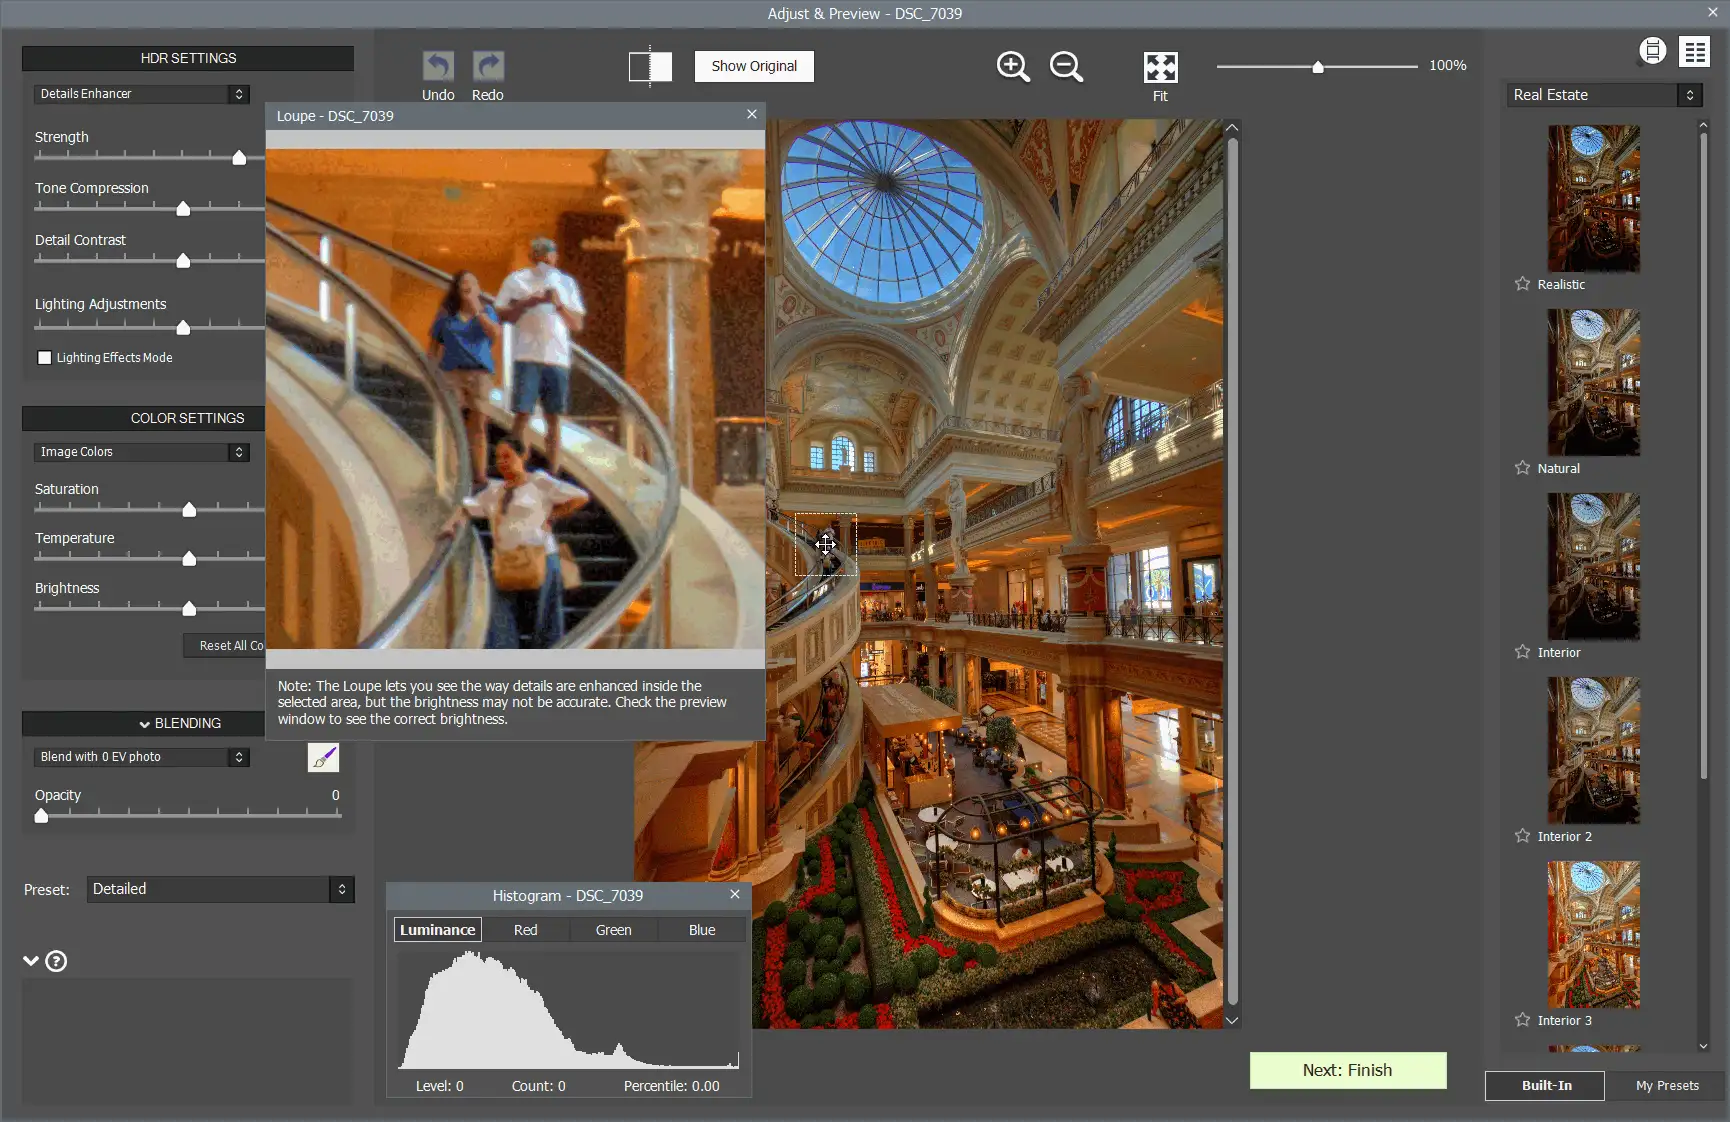
Style selection screen in more details:
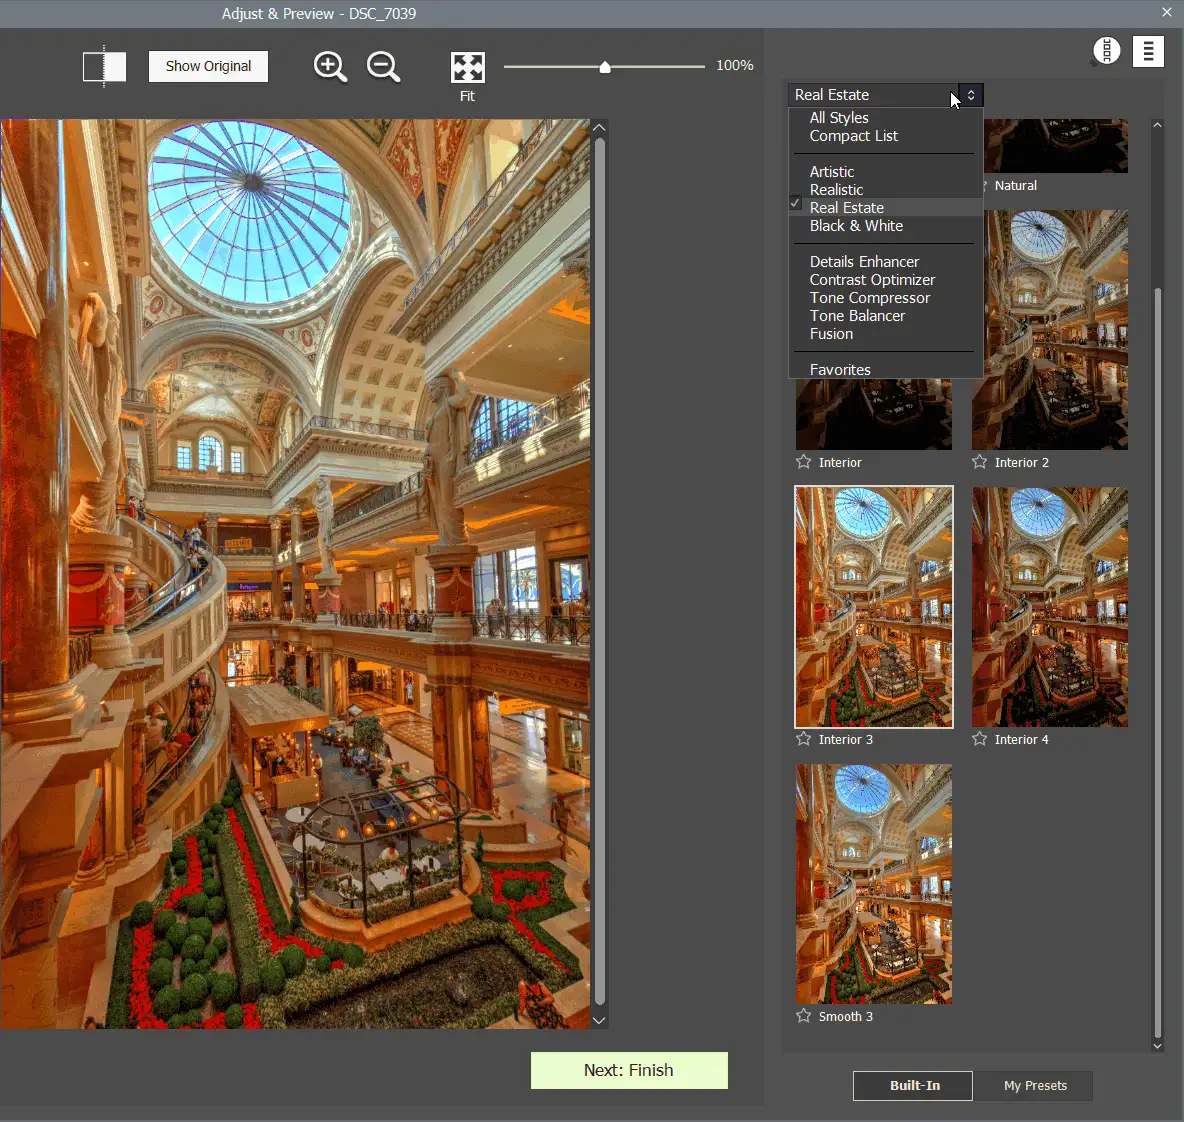
Final screen interesting options:
- Redo with Other Settings: brings you back to the style selection screen.
- Double HDR Effect: apply another style to the current result, effectively adding up effects. More artistic results…
🧭 Photomatix Styles Overview
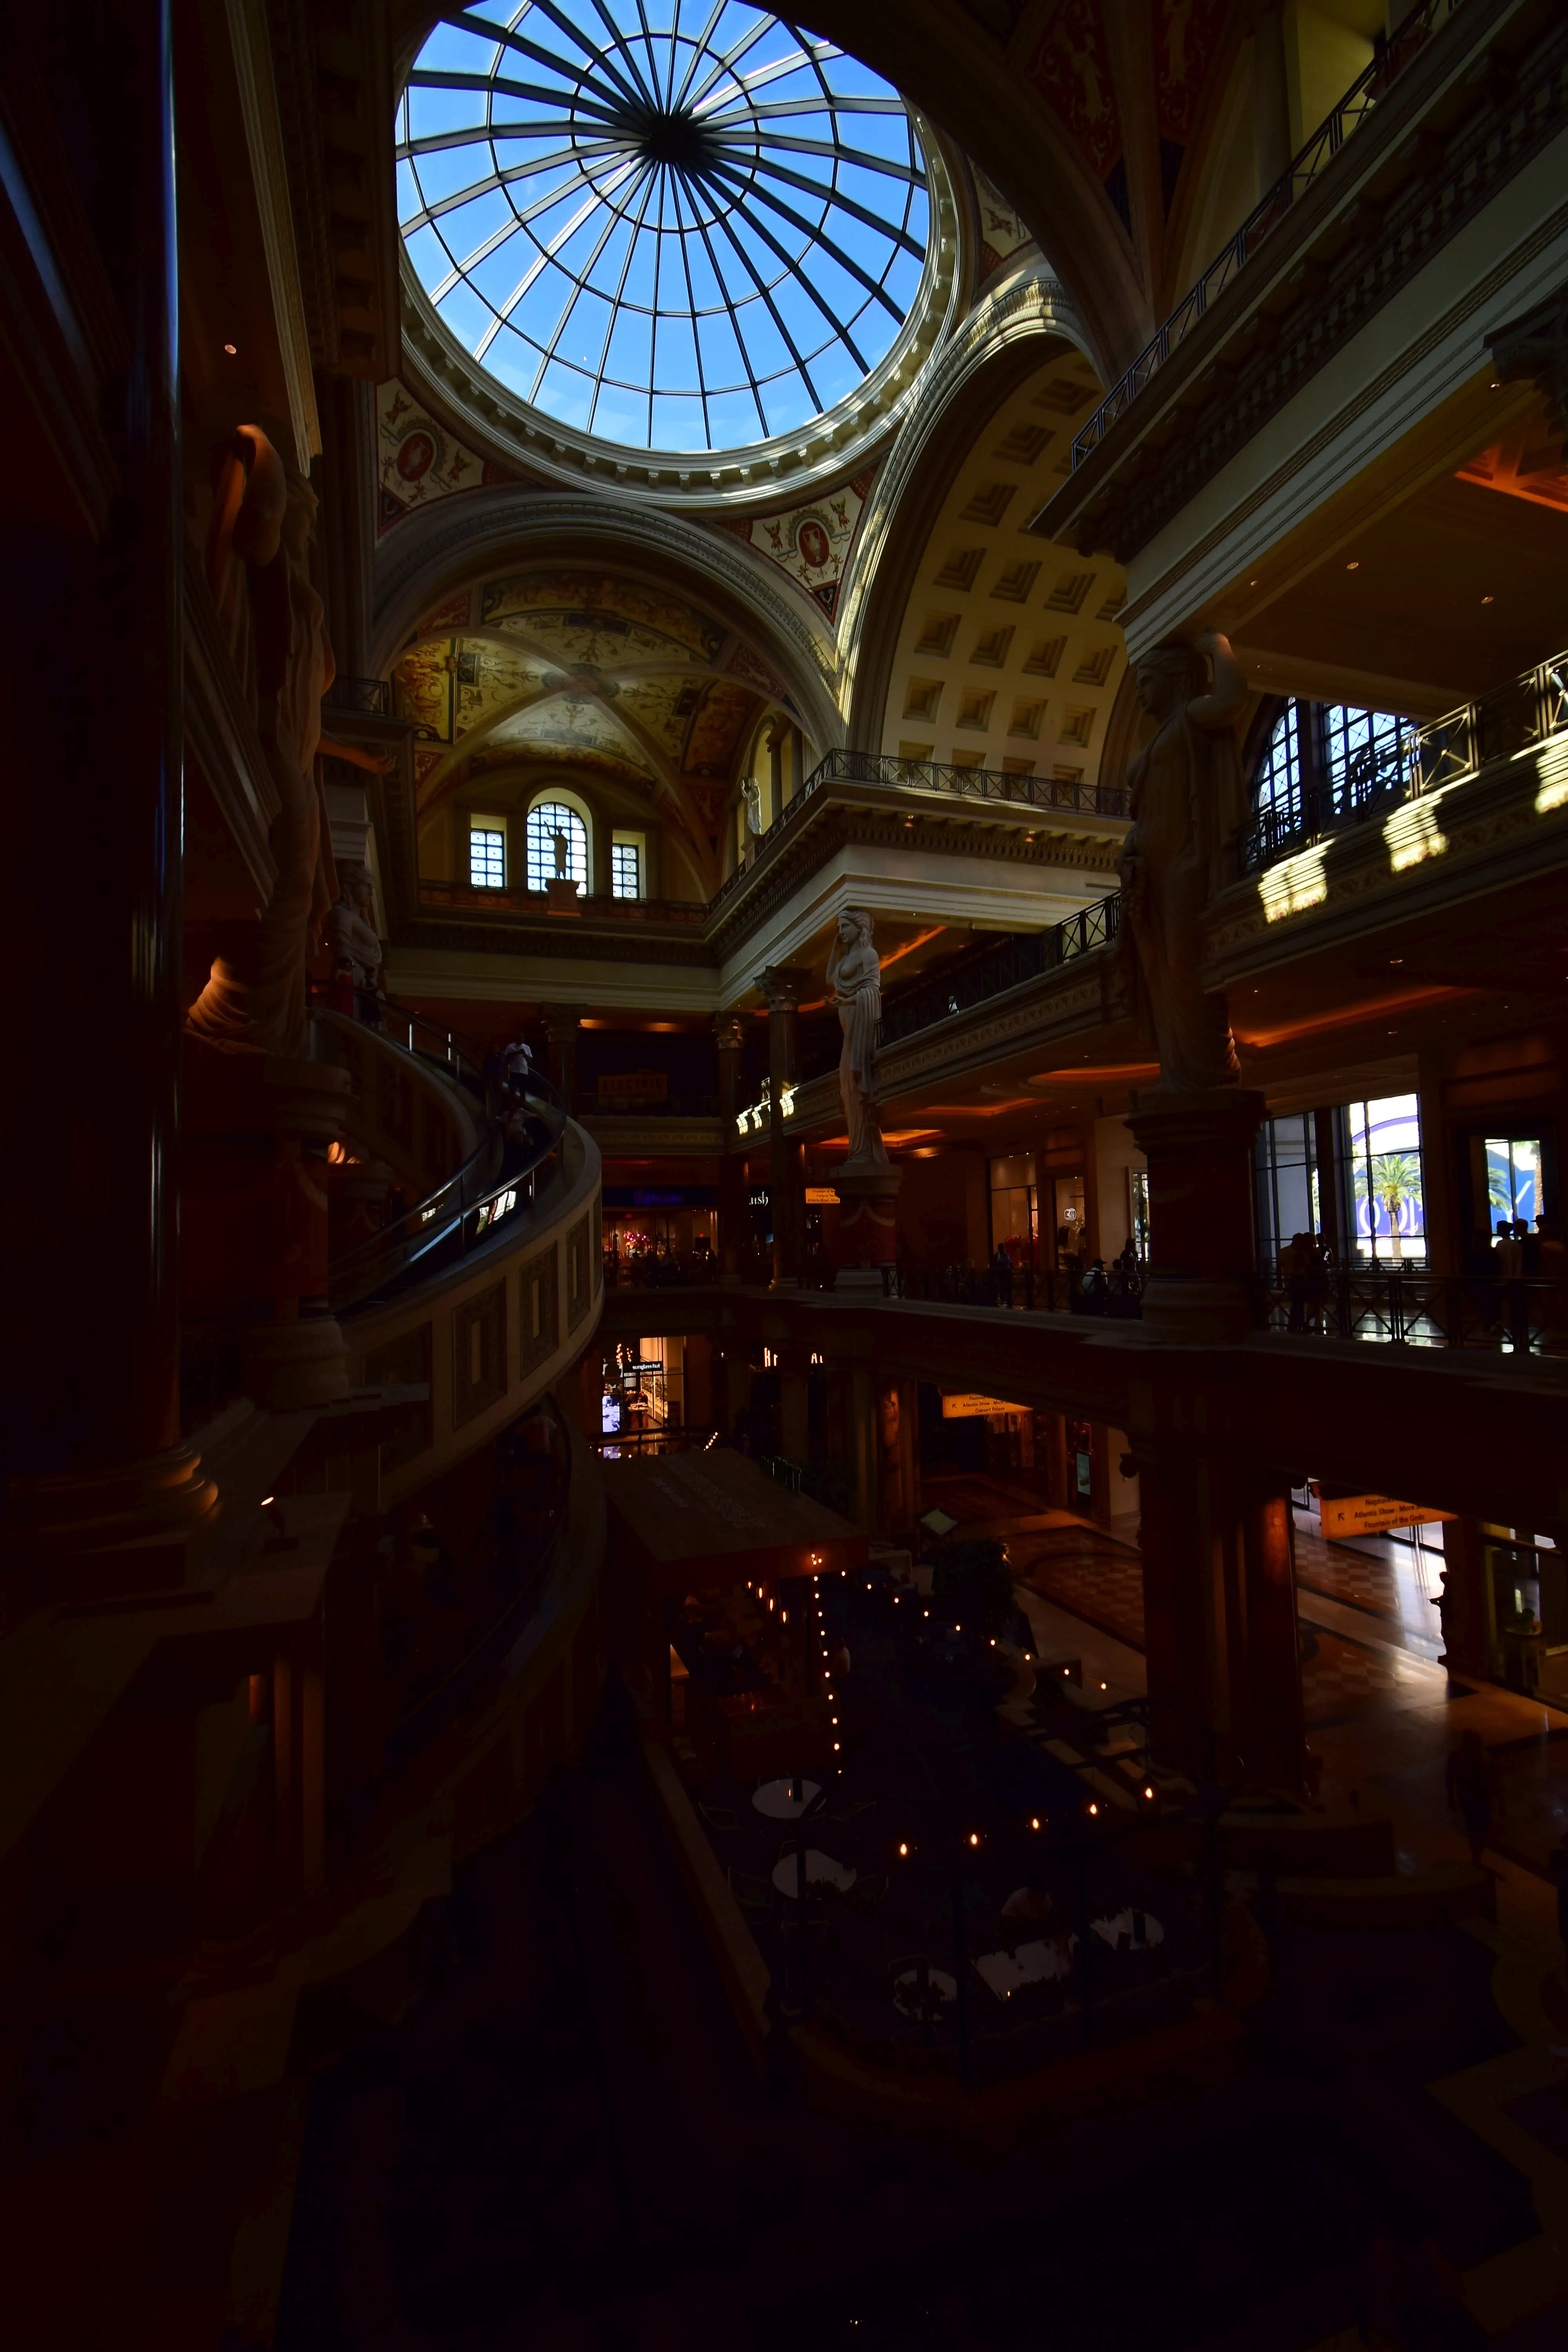
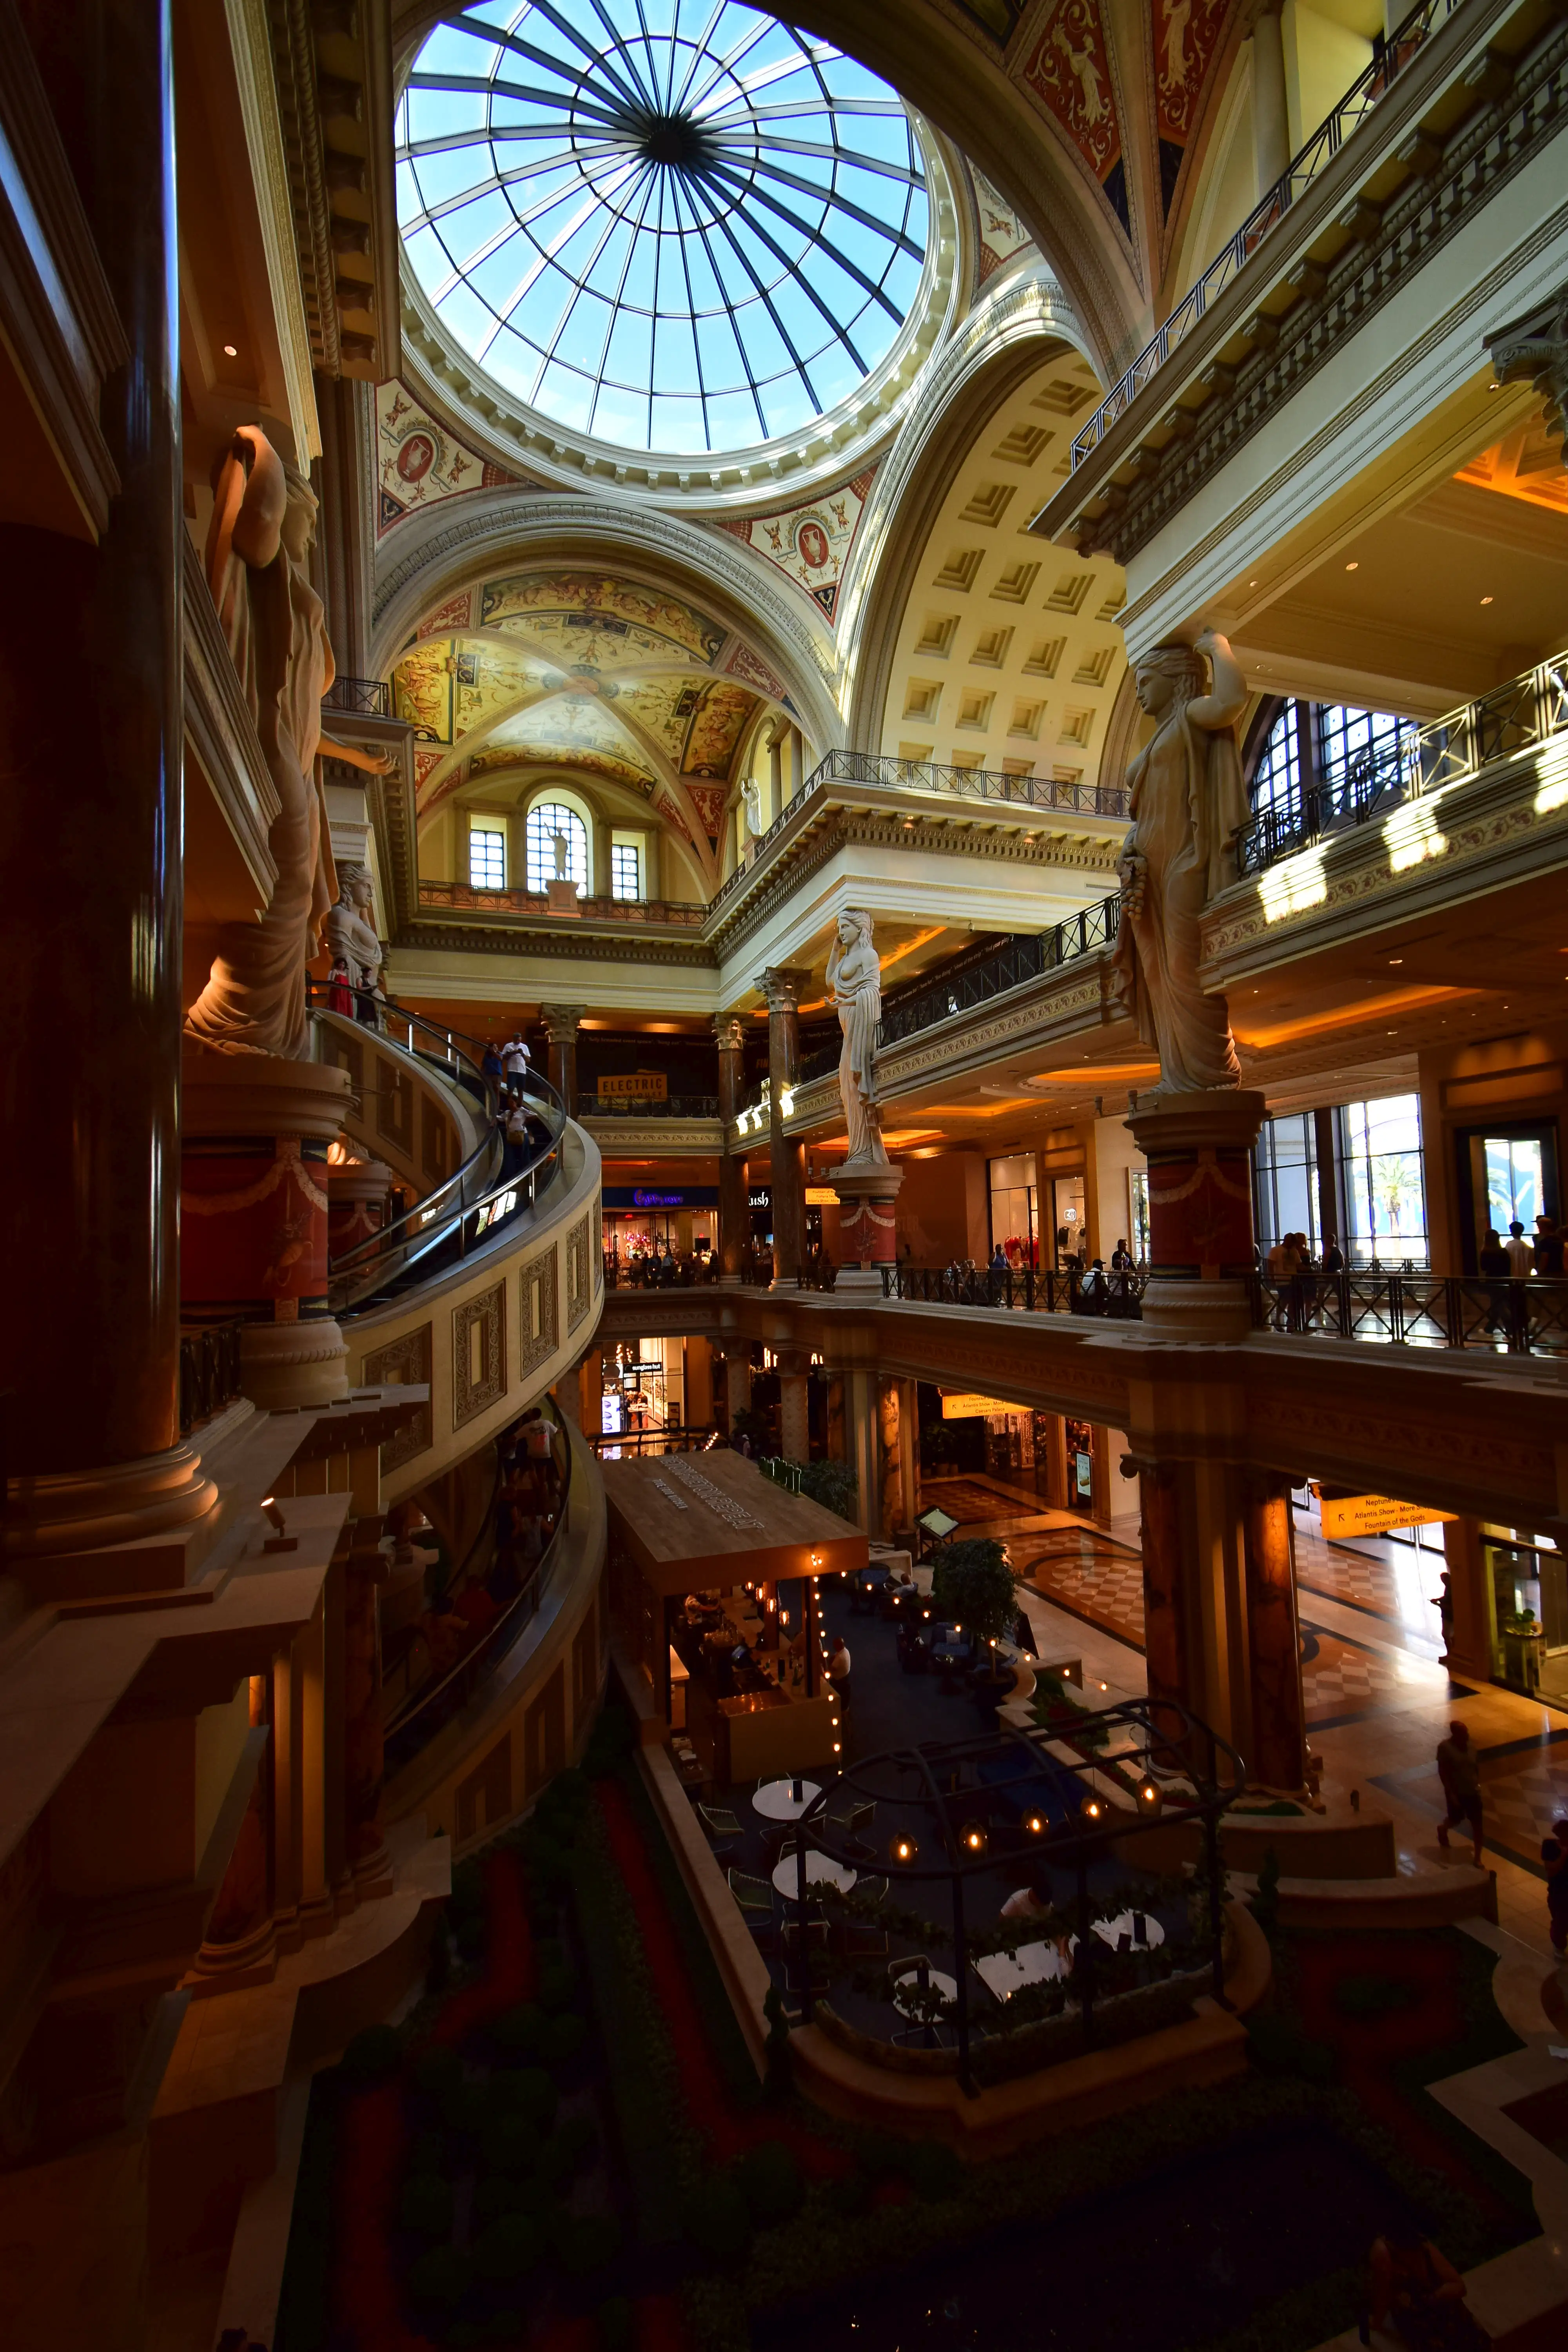
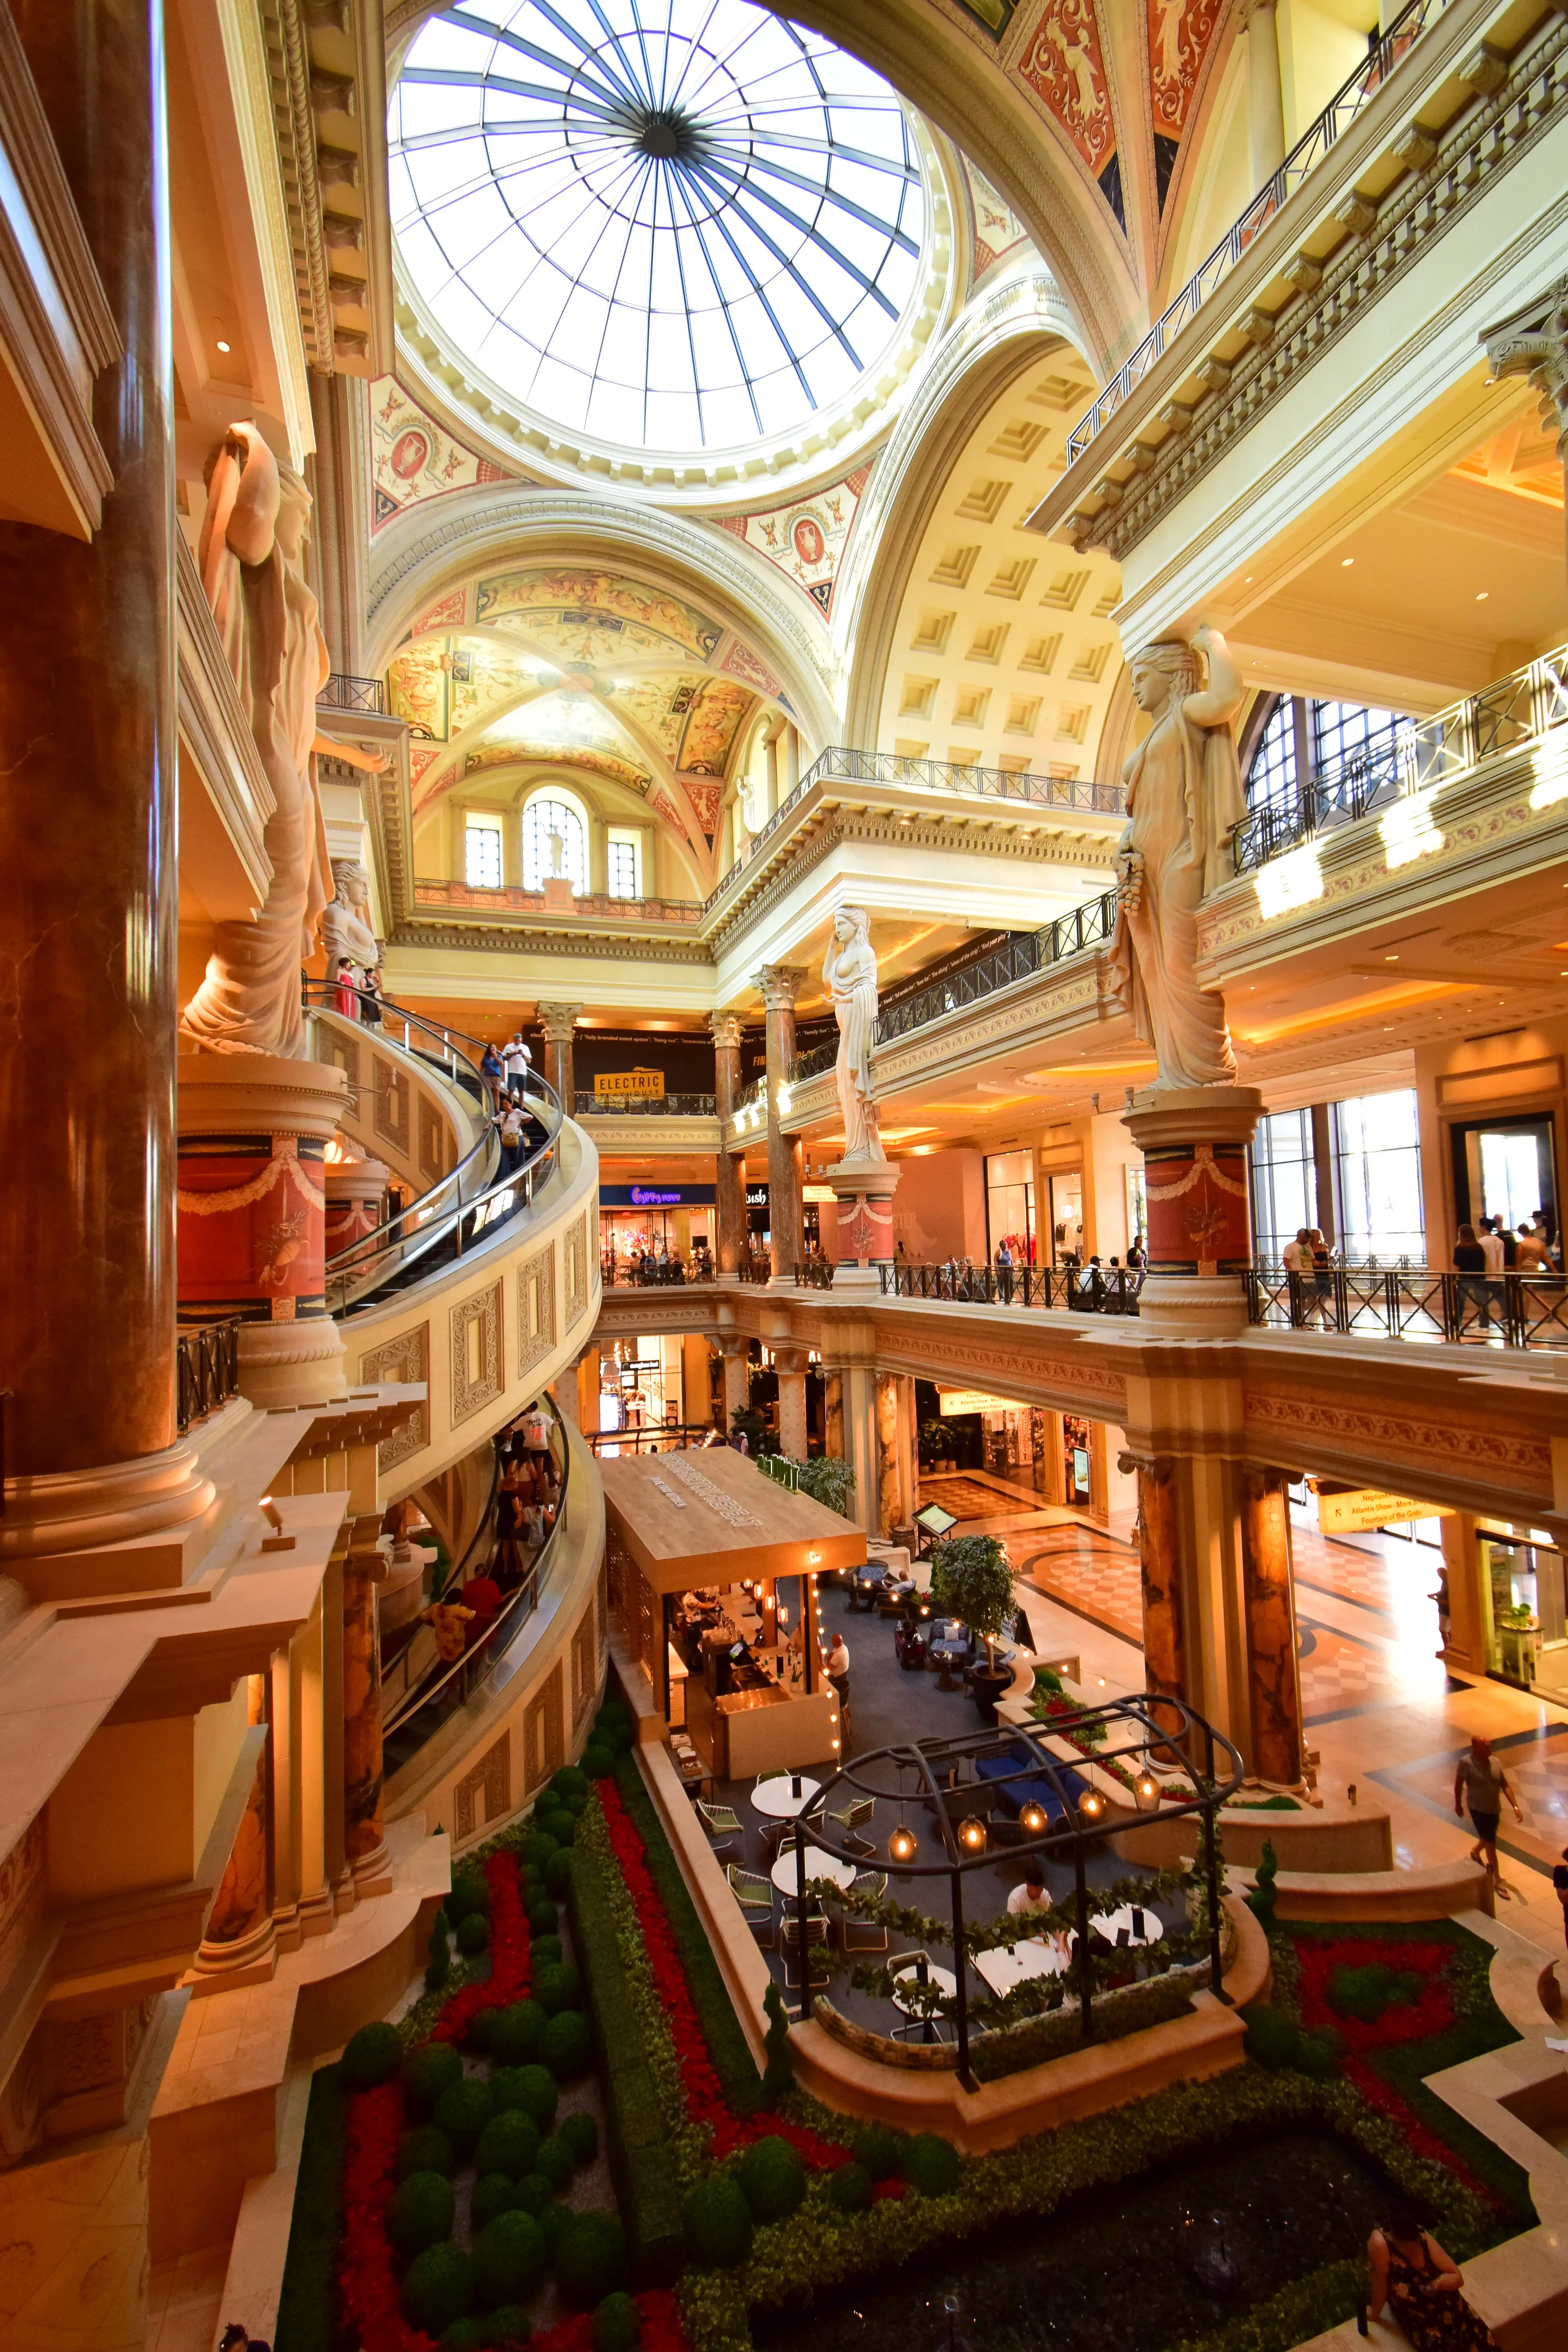
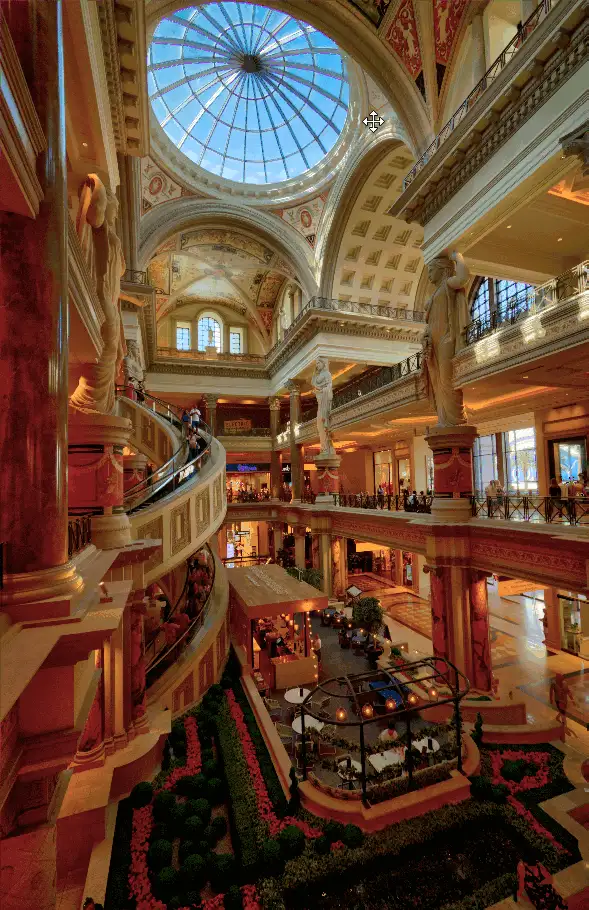
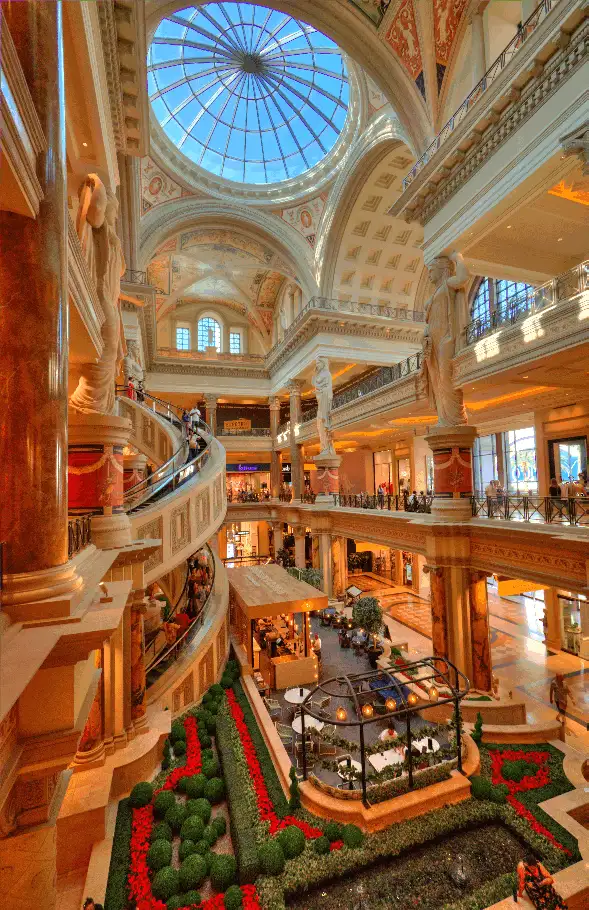
Realistic and Natural are really close to what you started from with the default EV+0 bracket. Here is it with 3 Real Estate styles to compare:

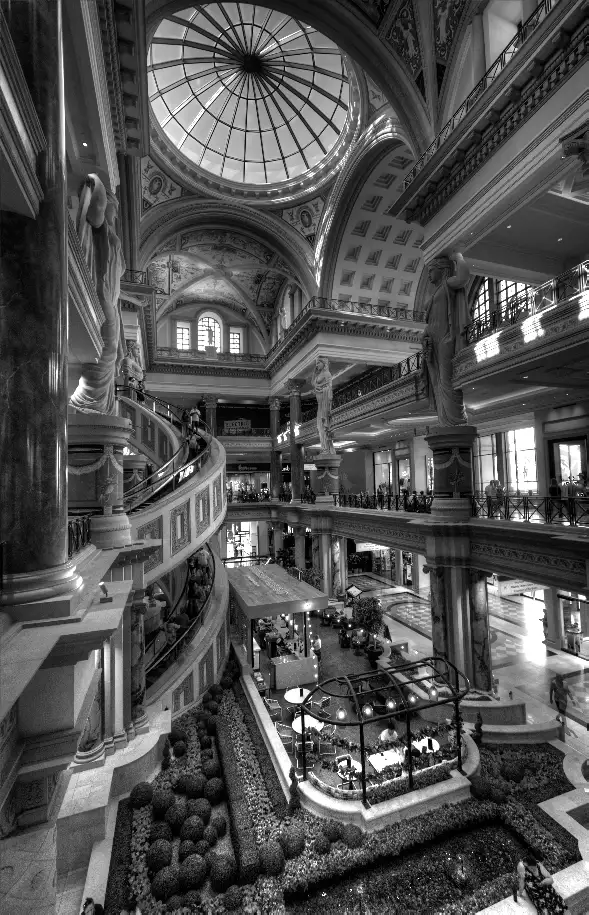
Some of the Black&White style really should be considered too, I love the smoothness of Monochrome 3:
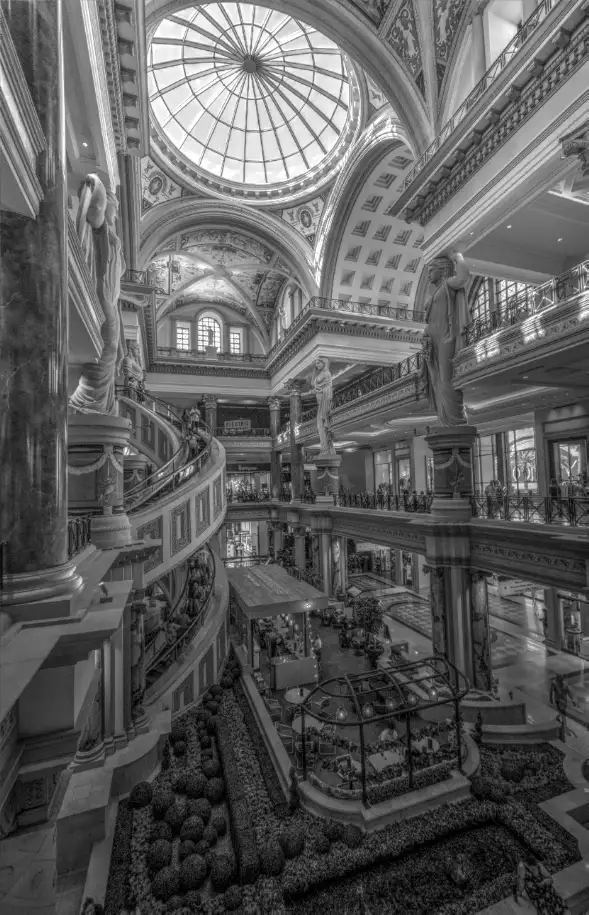
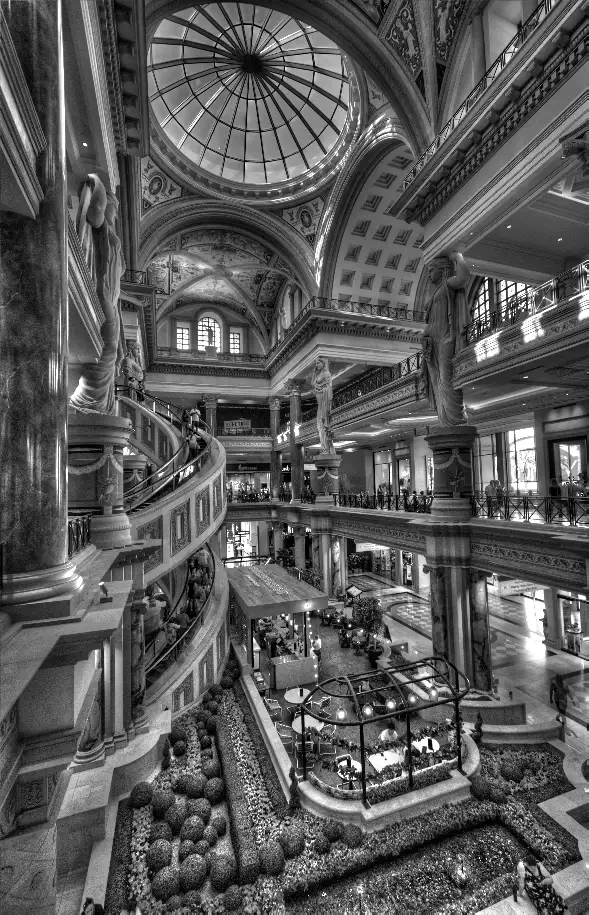
For this particular scene, I think Interior 3 looks best, which one do you prefer?
📜 Automate Your Life
Now is time to explore what those $99 you invested, can do for you. The way it works is pretty simple:
- First, you test with a sample brackets, to see what style works best with your set. Choose your sample brackets carefully.
- Select Automate > Batch Processing…
- Select source, outpout folder, and all the presets you used in your sample
- Click RUN and done!
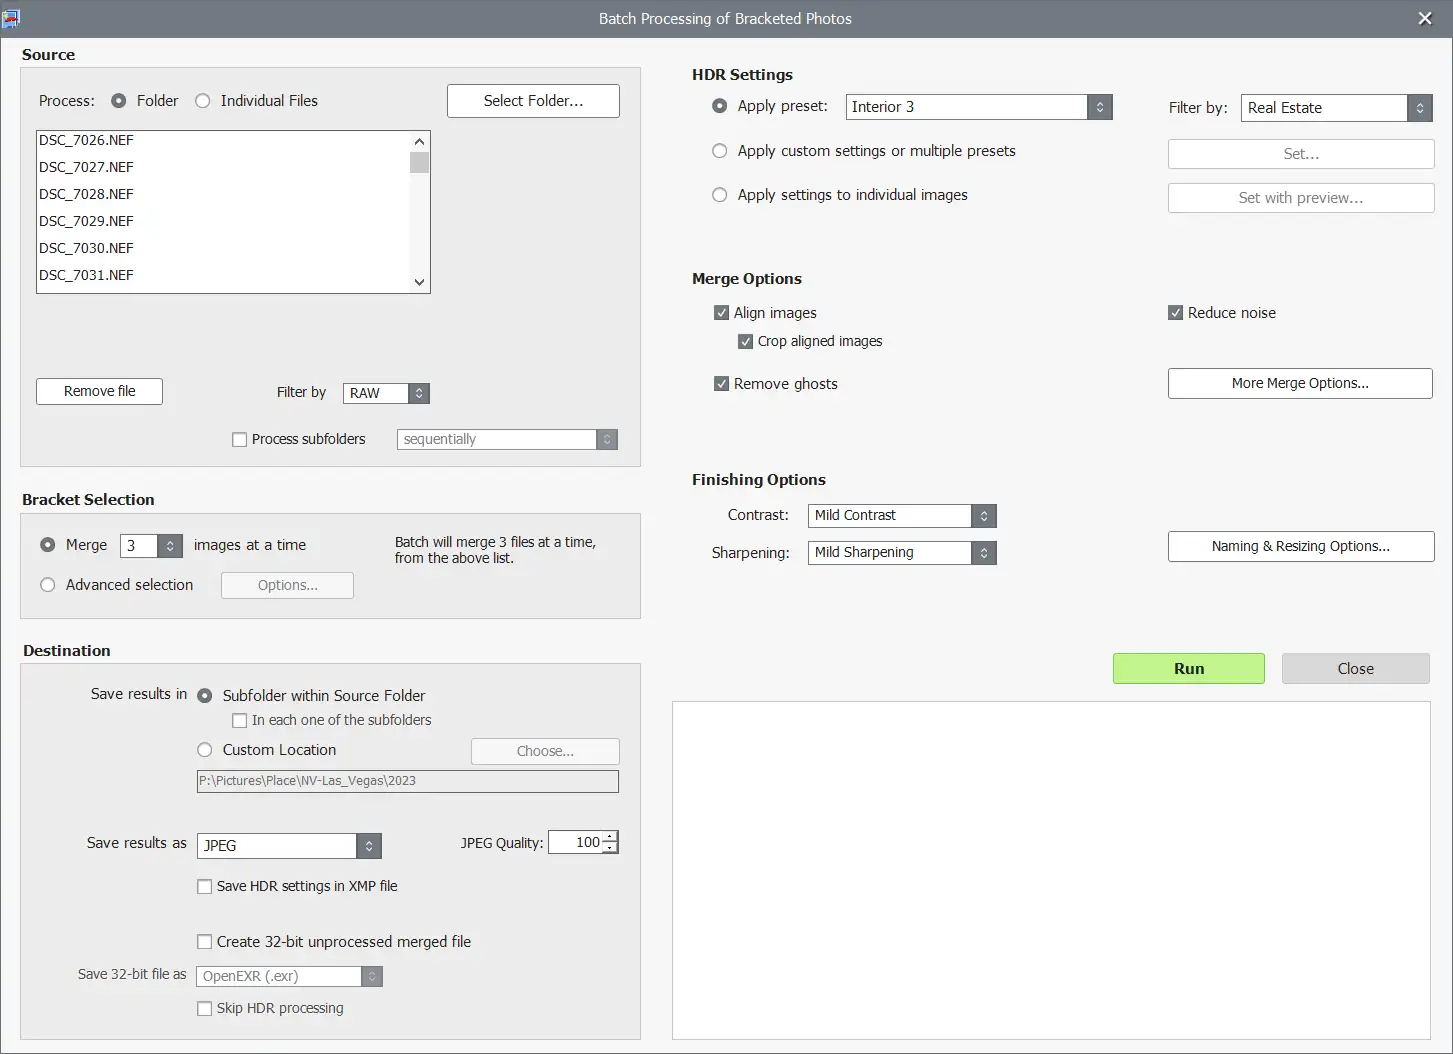
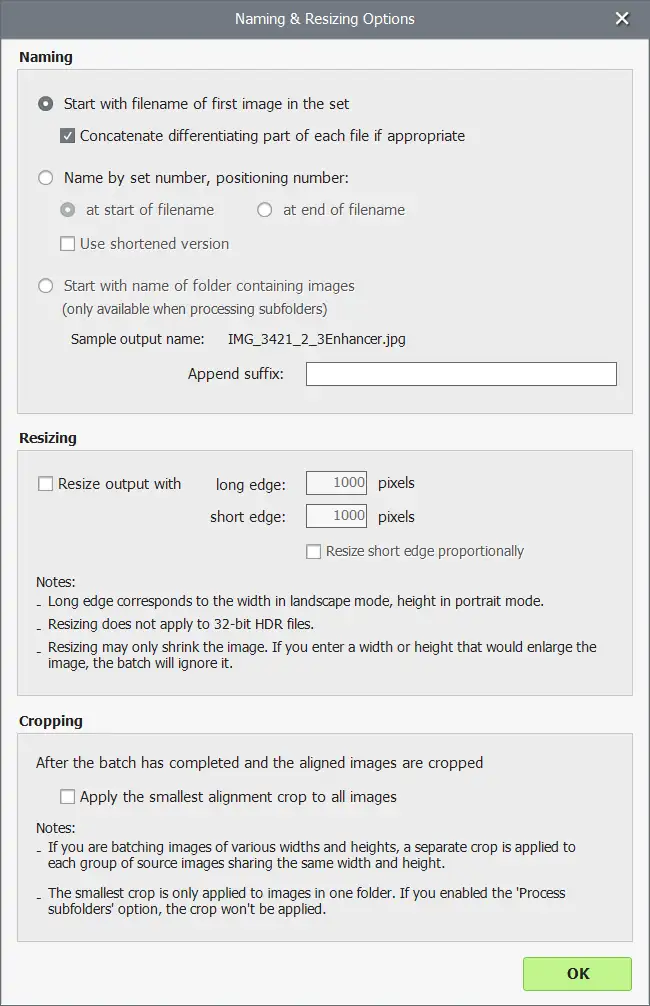
Photomatix Batch Options
The batch screen offers ALL the options you can dream of. For instance, you may have a mix of 3 and 5 brackets, in cases where light conditions justifies it. Advanced Selection option lets you do that!


Photomatix Outputs Multiple Styles at Once
Light conditions can vary widely between rooms, when you are shooting that house for sale. In this case, one style may work better then the other, but you cannot tell in advance when it should be used. Simply batch process your whole set twice or more, with different styles!

Photomatix Drawbacks
It would not be a honest review without pointing out what can be improved. Here is what we discovered so far:
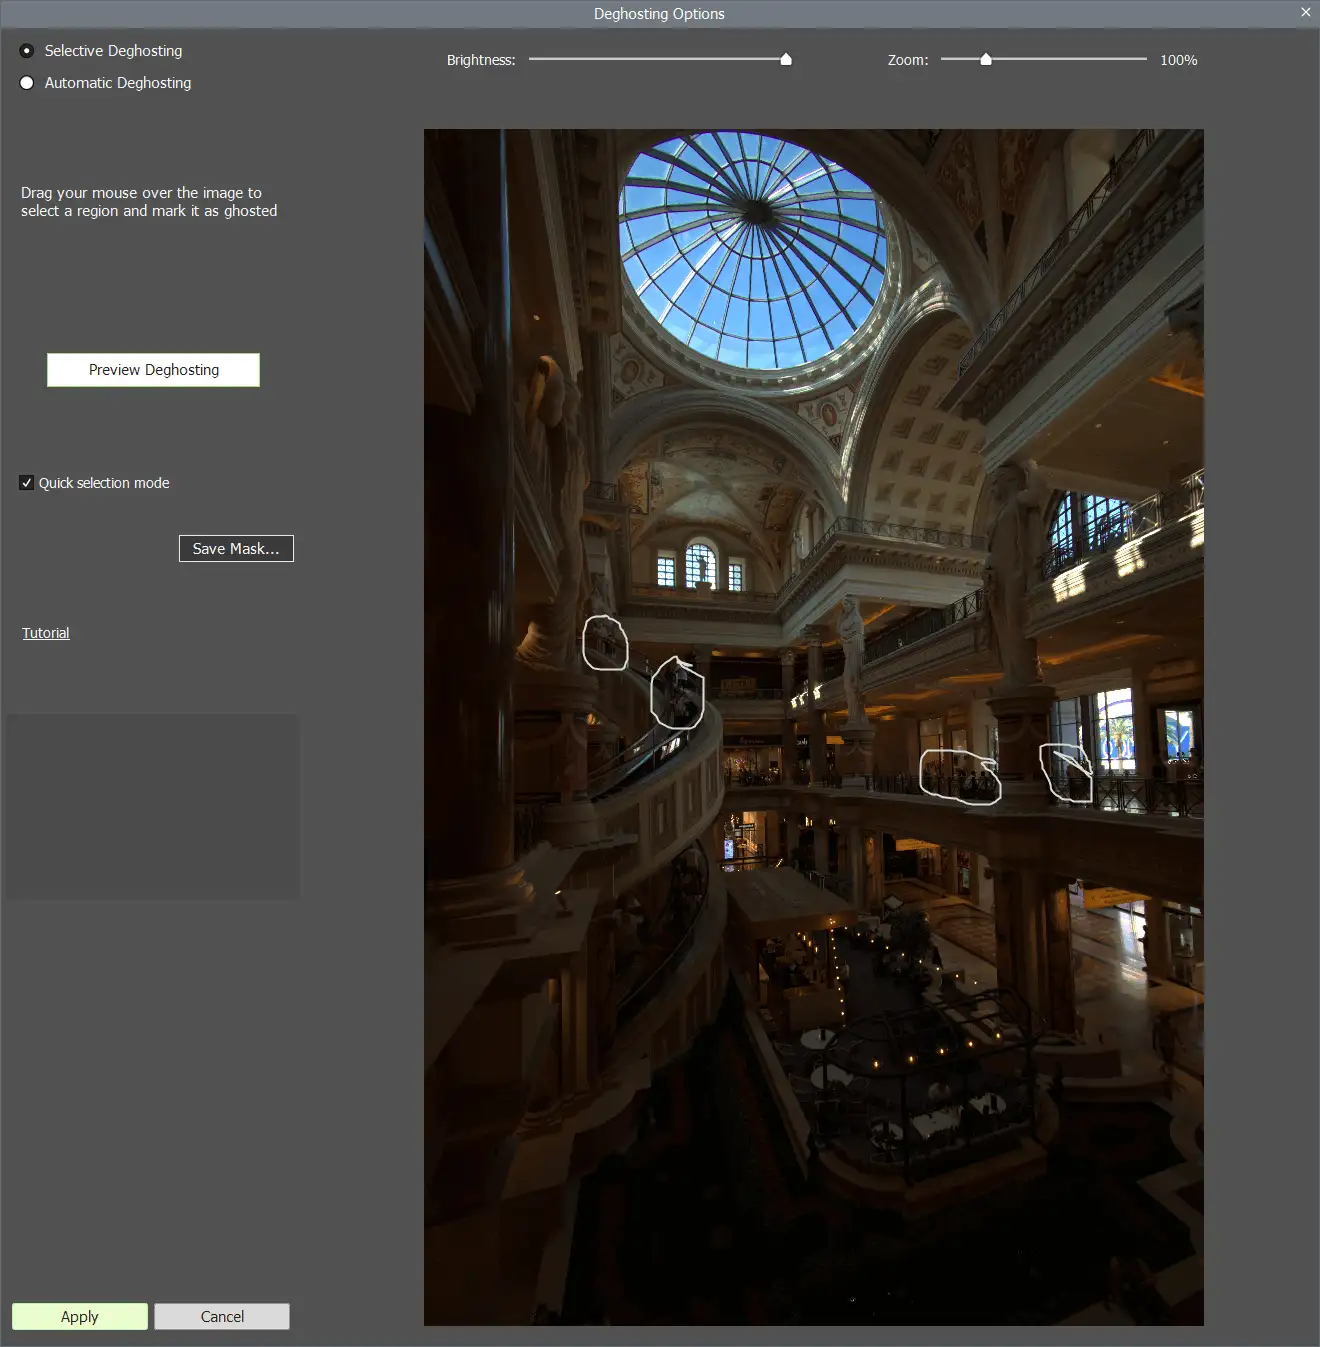
- Automatic deghosting does not work. Example below is with MAX setting. Use the selective deghosting instead.
- Noise in HDR output is to the roof
Here is a comparison of the same raw processing with standard noise reduction versus 150% noise reduction. Photomatix clearly mentions it will apply it to the originals, not to the output file. Results are the same, however the noise reduction value is.
More testing needed with less noisy original, to see if this noise only comes from Photomatix, or is an inherent problem that happens when originals are already noisy.
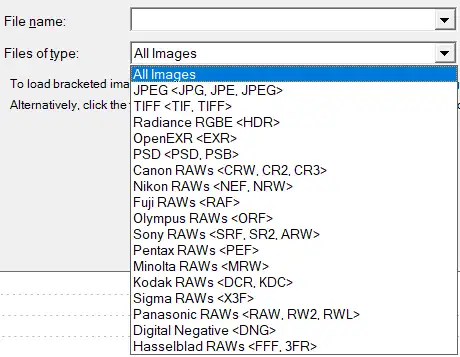
🗂️ File extensions considered
Depending on the process, some intermediary files can be generated and should be dealt with. Ordered from purest to crappiest:
- .RAW, .NEF: proprietary raw formats coming from your camera
- bitness: 12bit, 14bit, depends on camera
- .DNG: Adobe proprietary raw format
- bitness: 16bit or 32bit
- Can embed original raw formats
- Only Adobe software can use lossless compression, as it’s proprietary
- .TIFF, .TIF: the largest size of them all. Can be used as intermediary file
- bitness: 8bit or 16bit
- lossless compression: LZW is best
- .JPEG: what you upload online
- bitness: 8bit
- lossless compression: set quality=100
What formats does Photomatix handle? ALL OF THEM!
🧰 Extra software needed to handle HDR and RAW files:
- Batch/scripts: the more pictures you process, the more likely they will come handy
- exiftool: command line tool to extract metadata, tags manipulation
- exiv2: command line tool to extract embedded JPEG from a raw file
- IrfanView: free and small, quickly view a picture of any format
- CameraRaw: Installed with Lightroom, make sure it is up to date
- AdobeDNGConverter: free converter from Adobe, converts raw files to DNG
- RawTherape: free editor for raw files, needed by other free software such as HDRmerge or Hugin
- Topaz Photo AI: improve pictures with diffusion, aka machine learning, aka AI
- best noise reduction software I know of
- beware of its sharpening
- 3rd option: upscale images = doubling or tripling their size. Removes noise at the same time. Works best with raw files.
Wraping Up
If you have some bucks to spare and not afraid of scripting, go for Photomatix. Pro quality, easy, automated. Drop your files, process folder, boom done. Upload and get paid. Photomatix is without a doubt one of the best HDR software around, whether you use it for your job or as an Artist.
If I had one wish, that would be the ability to export the preset options you try manually, to let you use them in batch processing. This way you won’t have to remember what settings are needed for the batch. There can be lots of adjustments needed in colorimetry, to make things right.


sounds good as a starter, thanks