Connect to your Wi-Fi. Open https://www.iplocation.net/ or type “what is my ip” in google. Witness how the IP shown is that of your ISP! They collet everything they can: your personal information are still protected by HTTPS, however they know where you went to. You know what I mean. They sell these information to advertisers and now you have penis extension device Ads whenever you open a page.
This is where a VPN comes handy. However, you have to configure each clients, provided that you can. It can be painful to setup a smart TV when all you have is a TV remote control. Same punishment for those Android set-top boxes with a TV-like remote.
This tutorial shows how to configure the built-in OpenVPN client on DD-WRT routers with OpenVPN, and serve it over Wi-Fi. Transparently, for anyone connected, LAN included. Configuration-free! Fingers in the nose!
You need an OpenVPN server. You can buy a NordVPN access for $6/mo or build your own OpenVPN server for $1.25/mo at Virmach. VPN server for the price of a coffee!

Which router does this post cover?
This post will cover exclusively the one I have, but same principles apply for any other: Netgear® AC1900 – Nighthawk® Smart WiFi Router aka R7000:
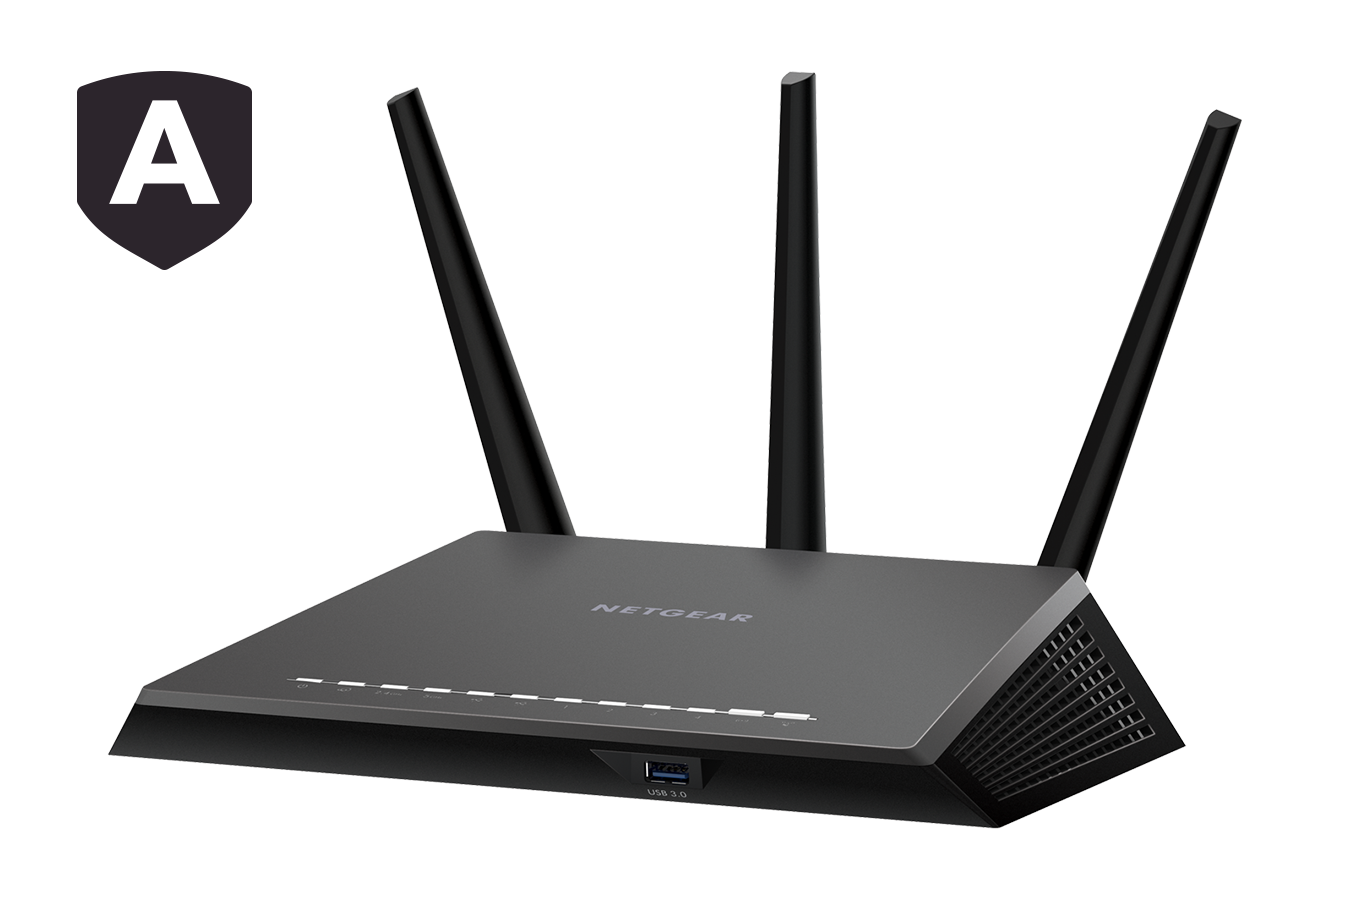
AC1900 Features:
- AC1900 WiFi—600+1300 Mbps speeds
- 1GHz Dual Core Processor
- Dynamic QoS prioritizes network traffic for uninterrupted video streaming for applications like YouTube®, Netflix® & others
- ReadyCLOUD® USB Access allows you to enjoy personal and secure cloud access to USB storage anytime, anywhere
Prerequisites
Quick recap on the steps needed to enable OpenVPN client over Wi-Fi:
Step 0 – Flash your Router
Step 1 – Basic Configuration
Step 2 – Wireless Configuration
Step 3 – Upgrade Firmware
Step 4 – Miscellaneous Settings
Configure Your OpenVPN Server
Step 0: Obtain OpenVPN Server Access
OpenVPN and Virmach and many others offer pre-configured VPN access starting from $6/mo if you want to pay more.
Building your own OpenVPN server is really simple if you use a custom script as detailed in this Howto.
Step 1: Obtain The OVPN Definition File
Whether you buy an existing access or build it yourself, you need to obtain your OVPN definition file. This definition file is a text file with .ovpn extension and contains critical setup keywords for the client, along with the mandatory TLS/CA/Private/Cert certificate keys.
Open it with a text editor such as notepad++ or notepad:
client
dev tun
proto udp
sndbuf 0
rcvbuf 0
remote 1.2.3.4 1194
resolv-retry infinite
nobind
persist-key
persist-tun
remote-cert-tls server
auth SHA512
cipher AES-256-CBC
setenv opt block-outside-dns
key-direction 1
verb 3
<ca>
-----BEGIN CERTIFICATE-----
AIIDKzCCAhOgAwIBAgIJANGL6Qjbdgv6MA0GCGSIb3DQEBCwUAMBMxETAPBgNV
...
2ngdjkGbLfaD3gdLxUJOl/TldU7n+smb4hOqPEhupJ5+ZVF7hYRtj1sKH+rKY=
-----END CERTIFICATE-----
</ca>
<cert>
-----BEGIN CERTIFICATE-----
AIIDRjCCAi6gAwIBAgIRAJRKi6JCtl66Ubb7WGYgFwgwDQYJKoZIhvcNAQELBQA
...
H2YKORObX/Xa4wunZQvyafoe8AuVPE/LM=
-----END CERTIFICATE-----
</cert>
<key>
-----BEGIN PRIVATE KEY-----
AIIEvQIBADANBgkqhkiG9w0BAQEFAASCBKcwggSjAgEAAoIBAQDENFCMUwVVH+Z
...
jdh7EtdCHOm/MmebRL50+o=
-----END PRIVATE KEY-----
</key>
<tls-auth>
-----BEGIN OpenVPN Static key V1-----
8fdb69aaa06abc8fb5f1291e738565d
...
3b408b2ac8cd3ce6caadc9fe4b2e889
-----END OpenVPN Static key V1-----
</tls-auth>
Step 2: Test Your VPN Access On Windows
After installing OpenVPN client on your desktop, double-click the OVPN file to load it. Procedure on Linux and MacOS may be somewhat different.
Then connect by right-clicking on the taskbar icon:

This validates your server configuration. Do not move on to the next step until this works!
Configure DD-wrt OpenVPN Client
Make Sure You Have Internet Access via Wi-Fi
This may sound stupid, but check that you still have access to Internet from your DD-wrt Wi-Fi. Whether your router is configured in Router mode or Gateway mode doesn’t matter.
Disable IPv6
Navigate to Setup > IPV6. Set IPv6 to Disable, then Save & Apply Settings.
(this is a recommended step to make sure you get no IP leaks)

Step 1: Enable OpenVPN Client
Once in the router management console, ‘Services’ > then ‘VPN’.
Scroll down to ‘OpenVPN Client’ and Enable OpenVPN Client


Needless to say all these settings depends on your VPN server configuration, but below are the usual defaults for an OpenVPN server installed as of 2020:
- Server IP / Name: Enter the server DNS/IP
- Port: 1194
- Tunnel Device: TUN
- Tunnel Protocol: UDP
- Encryption Cipher: AES-256-CBC
- Hash Algorithm: SHA512
- User Pass Authentication: Disable (we use certificates)
- Advanced Options: Enabled
- TLS Cipher: None
- Compression: Disabled (useless anyway)
- NAT: Disable
- Firewall Protection: Enable if you like
- IP Address: leave blank
- Subnet Mask: leave blank
- Tunnel MTU setting: 1500
- Tunnel UDP Fragment: leave blank
- Tunnel UDP MSS-Fix: Disable
- Verify Server Cert: Leave unchecked – NEVER ENABLE THIS ANYWHERE unless you suspect a man-in-the -middle within your network.
- TLS Auth Key: leave blank
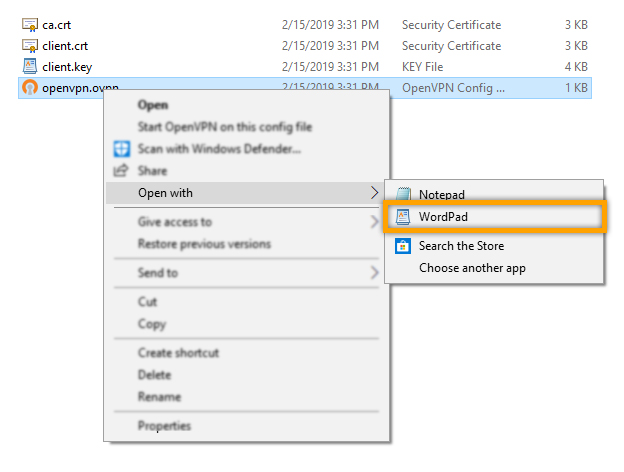
- Additional Config: Go to the folder where you’ve extracted the downloaded configuration, right-click the ‘openvpn.ovpn’ file and open it with a TEXT editor (any text editor will do but WordPad displays the config. more clearly).
Paste Certificates
Next, you have text fields to fill. Copy and paste the information from the OVPN file where it makes sense:

- Additional Config: copy only from resolv-retry infinite to verb 3
- verb 3 = verbose level 3 – you can increase or decrease the verbose level by changing this number.
- Paste only what is provided in the OVPN file in the correct certificate parts. If parts are missing then you don’t need them.
MTU Tweak (deprecated)
Please ignore this section. Default DD-wrt client uses dynamic MTU with mtu-dynamic
For best efficiency, you don’t want your UDP packets fragmented. You need to determine your MTU and setup the client and server accordingly. If you cannot modify the server, that is fine. At least the client won’t send oversized packets.
You can see if your packets are fragmented by accessing the DD-wrt syslog under Status > Syslog:


To find out the ideal UDP MTU, use these commands on Windows client:
ping -n 1 -f -l <size> server-IP
On Linux client:
ping -M do -s <size> server-IP
Start with size=1400 and work your way up and down (dichotomy) until the pings stop working. Example:

Add 28 to the value you found and add this line in the Additional Config section (in this EXAMPLE, 1464 + 28 = 1492):
fragment 1492
Also add this line in the server.conf if you own your VPN server.
Save Configuration
Save then Apply Settings:

Step 2: Check the logs
Go to Status > OpenVPN to see what’s going on:

You don’t want to see ANY WARNINGS or ERRORS. Amend the OpenVPN client settings accordingly.
Step 3: What is the name of your tunnel interface?
Click on the Administration tab > Commands
Find out the TUN name (usually tun1 or tun0) of your internal tunnel interface. In the Command Shell field, type ifconfig then hit Run Commands:

Is it tun0 or tun1?
Step 4: Enable packet forwarding
In the Command Shell field, type the command below then hit Run Commands:
sysctl -w net.ipv4.ip_forward=1
There are more than one network setting to enable but I discovered they are already are by default, at least on the version for Netgear AC1900 R7000. Just to be sure: you can pass these commands in the same way if your router is different:
echo 1 >/proc/sys/net/ipv4/conf/tun1/forwarding
echo 1 >/proc/sys/net/ipv4/conf/br0/forwarding
Step 5: Update Routing Rules
Routing for Everyone
Setting this up will literally VPN the Wi-Fi for both antennas, and any LAN you configured so far. I suspect this the have been fixed in latest builds, to be verified.
Copy and paste the following commands in the same field, adapting tun1 to the correct number:
iptables -I FORWARD -i br0 -o tun1 -j ACCEPT
iptables -I FORWARD -i tun1 -o br0 -j ACCEPT
iptables -I INPUT -i tun1 -j REJECT
iptables -t nat -A POSTROUTING -o tun1 -j MASQUERADE
This time, hit Save Firewall

This will update the DD-wrt iptables firewall. Explanations:
3: Reject direct access to tunnel tun1
4: Append a NAT for the tunnel interface tun1 in the last routing chain
IP Masquerade is also known as Network Address Translation (NAT) and Network Connection Sharing.
IP Leak Prevention (optional)
To prevent your IP leaking if the router disconnects for any reason, you can add this line to the firewall rules above:
iptables -I FORWARD -i br0 -o vlan2 -j DROP
This will reject all connections to VLAN2 = WAN = reject access to Internet from br0 (LAN+WAN bridge) = force the LAN to pass through tun1 (or tun0, name can be different for you) to access Internet.
Routing for Specific LAN/Antenna
TBD
Step 6: Reboot the Router
You can then check in the logs afterward, as shown above. Confirm that you are still connected to the VPN.
Step 7: Enjoy
Connect to you Wi-Fi. Open https://www.iplocation.net/ or type “what is my ip” in google. Witness how the IP shown from your smartphone, your Kodi box and your desktop are the OpenVPN server’s!
You can now enjoy your Wi-Fi as you would normally do, knowing that the traffic is ENCRYPTED through VPN. For all clients. Transparently. Configuration-free. Au-TO-ma-TIC. MA-GIK.